Well have had this one sitting stripped down for a couple of years now, and with too many other projects in the road, never got around to it. With 1 more weeks leave, i thought i would make a start on this one and try to get a chunk of the cabinet work done. Not ideal conditions with 36 degree days and 90% humidity in Townsville, but have the fans cranking in the shed!
Started this arv with this…


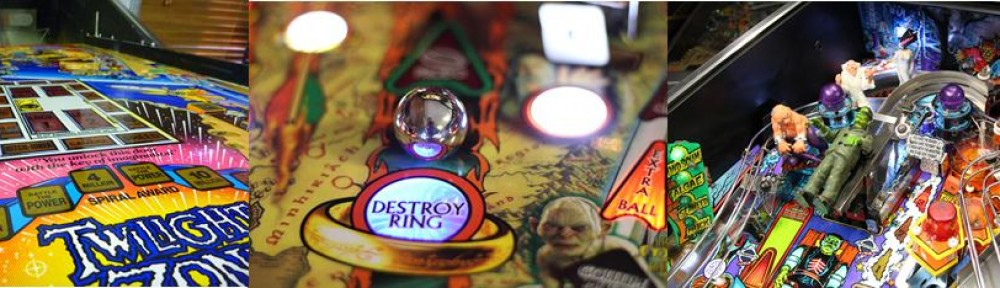
I had previously stripped the playfield to have touched up and cleared by Savage Restorations in Brisbane, and it has been boxed away waiting to be rebuilt.
Ripped all the old bits out, and started organising them into bits to be cleaned and/or replaced and working out what parts i might need.
Cab itself is solid enough, but has quite a few chunks and gouges

Basically stripped everything out, then got onto removing the headbox decals
Before

Without exaggeration, 30 seconds later

I only recently got this Metabo sander, and it is AWESOME. It has an aggressive mode, and just eats the artwork off, taking the glue residue with it. Both sides of the headbox were sanded to bare timber in just over 5 minutes.
Clamping the cab together and glueing and screwing. There was a slight opening on the front corners.

This is my first attempt at using fibreglass resin to repair corner damage. Apparently it is much stronger than bog.
First step was to make a guard to stop it running everywhere. Got a 1mm thick aluminum strip from bunnings and bent this and nailed to the cab. This was coated with wax prior to nailing to ensure the resin didn’t stick to it.
Then mixed a small quantity of resin and hardener in the kids medicine cup and dropped in with their syringe….hopefully they don’t get sick tonight!
It goes off to a state where it won’t run in a few minutes and then i removed the aluminum. Will leave overnight before sanding it.


Had a pretty big day today in very hot weather! Started by sanding down the fibreglass resin and some bogging done last night.

Then more bogging and sanding and removed the rear rails on the back of the cab.

Then after more bogging and sanding was happy. Final sand with 600 grit

Put the rear rails back on after a sand and primer coats.

Then just finished a couple of coats of satin black on the inside, rear and edges.

Will let the black cure for a week or two until i put the decals on….time to head to the air conditioning now!
While waiting for the cab paint to cure, started cleaning and polishing some of the metal cabinet bits, painting cabinet bolts etc.
Also gave the transformer a tidy up and gave its legs a quick polish.

I gave the figures a coat of clear by hanging them from a ladder

A couple of places on them went a bit cloudy as it is so humid here, so i sanded those spots back and gave it a quick touch up with clear again in my makeshift spray booth…otherwise known as the laundry tub! At least inside it was air conditioned and a lot dryer and the clear was much better.

Got my toothless helper on board today.

Love the colour in these decals.


Got the cab done.

I use the metal cab protectors that stand the legs off the cab so as not to cause decal wrinkling. I fit the protectors, then cut about 1mm or so away from them by angling a blade

Then remove protector and cut part of decal away. This corner is the one that was trashed and repaired with fibreglass resin.

A few shots of the finished cab, with inner cab decals installed as well.


Well i certainly appreciate that this may not be to everyones taste, however its something I’ve wondered about for a while….using cab decals on the inside.
These were 2nds decals with the colours a little washed out, so there was no real other use for them.
So i cut a template out of a large sheet of paper first, then cut the decal out to suit. If you think installing decals on the outside is a pain and challenging, have a go at dodging bits on the inside!
I also appreciate it will hardly ever be seen, but to me i thought it was some use of otherwise fairly useless decals. Depending on how it looks with a populated playfield, i still might put pinblades or mirror blades on the upper portion.


Had today off so got some more done. Fitted off most of the cabinet hardware and wiring. I leave the protective coating on the nice shiny new rails. Headbox and boards also installed which always feels like the end is in sight as it starts to look like a pinball machine again!
Then time to start on the playfield!
All tnunts installed and a few other bits, then start to organise the harnes.


Well its almost done. Finished the playfield today, installed some self adhesive felt along the playfield edges so as not to damage the inside art
Then plugged it all in with a couple of minor switch and bulb adjustments and it was good to go. Im happy with how the inside art turned out, from above the playfield it matches quite ok.
A few quick pics but will get more once the translite is done.


A few final shots . Just need to get some translite trim and polish the lockdown bar. Really fun game and plays super smooth with the cleared playfield.


